If your car smells damp after a storm, if the cabin gets loud on the highway, or if you see a thin line of fog creeping along the edge of the glass on a cold morning, there is a good chance the window seals are telling you something. In High Point, quick swings between humid summers and sharp winter cold are tough on rubber and urethane. A small gap at a seal doesn’t look like much, but it can soak a carpet, corrode electronics, and fog your view when you least expect it. I’ve spent years around glass techs in the Triad, watching how small mistakes with seals lead to big, expensive problems. Done right, seal repair feels simple. Done wrong, it becomes a cycle of leaks, rattles, and replacements.
This is a practical walk through why window seals matter, how to read the symptoms, what repairs typically involve, and where a DIY approach makes sense. It also explains when you should stop guessing and call a pro who knows High Point’s climate and roads, whether you prefer mobile service at your driveway or a shop equipped for more complicated jobs. The goal is straightforward: keep water where it belongs, noise out, and your glass safe.
What window seals actually do
Automakers use several types of seals around glass, each with a job that overlaps with the others.
- The outer weatherstrip wicks water away from the top edge of the door glass and keeps grit out of the window channel. The inner belt molding wipes the glass as it moves and helps block cabin noise. The fixed-glass urethane bead, used for windshields and many quarter and rear windows, bonds the glass to the body and forms a watertight, structural seal. Encapsulated glass, often seen on rear quarter windows, uses a rubber or plastic frame molded to the glass that clips or bonds to the body.
If the seal fails, water finds seams and follows gravity. It may drip onto a speaker, collect in a door and rust the bottom seam, saturate carpet padding, or creep into a module tucked under a seat. Noise follows the same gaps. At highway speed, even a millimeter of space can turn the cabin into a whistle chamber. A bad windshield urethane seam hits safety too, because modern windshields act like a structural member that helps the roof resist collapse and anchors the passenger airbag in a crash.
Why High Point vehicles see seal wear
The Triad’s weather punishes rubber. A humid August afternoon at 95 degrees, then a cold rain, then a frost within a few weeks, expands and contracts seals repeatedly. Add road salt brines on winter days and pollen grains that pack into door channels in spring. Parked cars bake on blacktop, especially at retail lots off North Main and Wendover. That cycle dries out rubber, flattens the memory of weatherstripping, and breaks the adhesion of the urethane bead along the glass frit. I’ve seen five-year-old vehicles with sun-facing, passenger-side seals more tired than the driver’s side, simply because of how the car sat at work every day.
Reading the symptoms
Most drivers notice a leak only after a hard rain. Some signs arrive earlier if you know what to watch.
- Drip marks on the inside of the A-pillar trim, damp headliner corners, or wet floor mats after sitting. Musty smell that lingers two or three days, even with windows cracked. Wind hiss that rises with speed near the top front corner of a window, especially after a door adjustment or body work. Condensation banding along the glass edge on cold mornings, a telltale of trapped moisture between glass and trim. A window that chatters or binds as it moves, which can point to a torn or hardened run channel.
Simple checks help confirm the culprit. The dollar bill test works on door seals: close the door on a bill and pull. If it slides out with little resistance, the seal is not compressing. For fixed glass, use a low-pressure water hose, starting low and moving up, while a second person sits inside with a flashlight. A bright LED will show the first bead of water almost immediately where a gap exists. Avoid high-pressure washers for diagnosis, since they can force water past a good seal and send you on a false chase.
Repair, replace, or reseal: knowing the difference
Not every leaky seal means a new window. Most issues fall into a few buckets.
- Clean and recondition. Pollen, grit, and detailing residue can build up and prevent the belt molding from wiping or the run channel from guiding the glass. A thorough clean with plastic-safe tools, followed by a rubber conditioner, often cures a squeak or minor wind noise. Adjust and align. Doors sag as hinges wear. A few millimeters of striker adjustment can restore seal compression at the top rear corner. Glass needs alignment too, especially after a regulator replacement. If the pane sits too high at the front and low at the back, you create a wedge that fights the channel and opens a noise path. Rebond urethane. If a windshield or fixed quarter glass was installed poorly, you may see a localized leak. A pro can sometimes remove exterior trim, probe the bead, and add sealant for a spot repair. Most of the time, though, a compromised urethane bond calls for full removal and reinstallation with fresh adhesive. Replace weatherstrips. A flattened door seal or torn run channel does not come back to life with conditioner. You replace it. Good shops show you the old piece, because hard, glossy rubber is easy to feel with your own hands. Replace the glass. If corrosion has crept under the pinch weld where urethane should bond, a proper fix means removing the glass, cleaning and treating the metal, then reinstalling with new adhesive. Patching around rust is false economy.
The role of adhesives and chemistry
The difference between a lasting repair and a short-term patch sits in the cartridge. Quality auto glass adhesives are moisture-curing urethanes with specific open times and safe-drive-away windows. Temperature and humidity in High Point swing enough that a tech adjusts bead size, primer use, and cure expectations day to day. On a muggy summer afternoon, the skin time shrinks and the bead sets faster. On a dry, cold morning, primers matter more and cure is slower. Trying to reseal a windshield with hardware-store silicone almost always leads to a mess. Silicone will not bond reliably to glass frit or painted steel in automotive environments, and it complicates any later professional work because urethane hates to stick to silicone contamination.
For weatherstrips, a thin smear of silicone-free rubber adhesive at the corners can help keep ends from lifting. Many modern seals are designed to clip in mechanically with no glue, which is good, because adhesives can distort or swell the rubber if misused.
The limits of DIY
There is plenty a careful owner can do. Cleaning the belt moldings and run channels, applying a rubber protectant that does not leave an oily film, adjusting door strikers slightly if you have experience, and replacing a simple push-on perimeter seal are all within reach. Diagnosing a fixed-glass leak, working with urethane, or chasing a water trail inside the headliner is not a Saturday job for most people. It takes trim removal techniques that avoid breaking brittle clips, safe handling of airbags behind A-pillar covers, and a feel for how much bead height supports structural bonding.
If you notice water near the fuse box, in the rear quarter where the amplifier sits, or under a seat with airbag modules, stop. Disconnecting the battery and drying electronics properly can save thousands. That is where a shop that handles auto glass repair High Point locals trust becomes worth its fee, because they have the moisture meters, trim tools, and drying equipment ready.
How High Point shops approach a window seal complaint
A seasoned tech begins with a visual sweep. Belt moldings, corner joints, drain holes in the door bottom. If water collects inside the door because drains are blocked, it overflows past the inner vapor barrier and soaks the carpet even though the outer seal looks fine. I have watched techs clear a handful of maple seeds and fix what looked like a failed window.
Next comes a controlled water test with the car level. Shops that handle same day auto glass High Point drivers rely on use simple foam dams and low-flow hoses. They isolate areas: first the windshield corners, then the cowl, then door tops, then roof rails. They watch from inside with a mirror and light. If the leak appears between glass and body at the windshield edge, they look for skipped primer, thin bead, or surface contamination. If the leak appears at the top rear of a front door, they check alignment and compression.
Mobile auto glass High Point technicians can handle most of this in a driveway. For structural work, or when rust is visible, a shop bay is better. Windshield replacement High Point customers need for structural reasons should include careful pinch weld preparation, rust treatment if required, and a written safe-drive-away time. Skipping that step because it is raining or the schedule is tight is how future leaks start.
Weatherstrips, channels, and the subtle art of quiet
Stopping a leak is one goal. Making the cabin calm again is another. Door glass rides in channels that need the right friction and compliance. I keep a small block of felt and a bottle of glass cleaner in the shop because a single pass under a belt molding can change the feel of a window. When you replace a channel, seat it fully into the corners. A twisted or stretched run fights the glass and causes a bounce at the end of travel. That bounce in turn opens micro gaps at the top edge, and at 60 mph you get a whisper that sounds like a window is cracked open.
On older vehicles, wind noise creeps up as seals lose elasticity. If you are not ready to replace a full set, you can add a narrow, high-density foam insert behind a loose area, but do it with care and only as a stopgap. The foam should not trap water or push the door out of alignment. Long term, a proper seal set is the right move.
When a “repair” is actually replacement, and why that’s ok
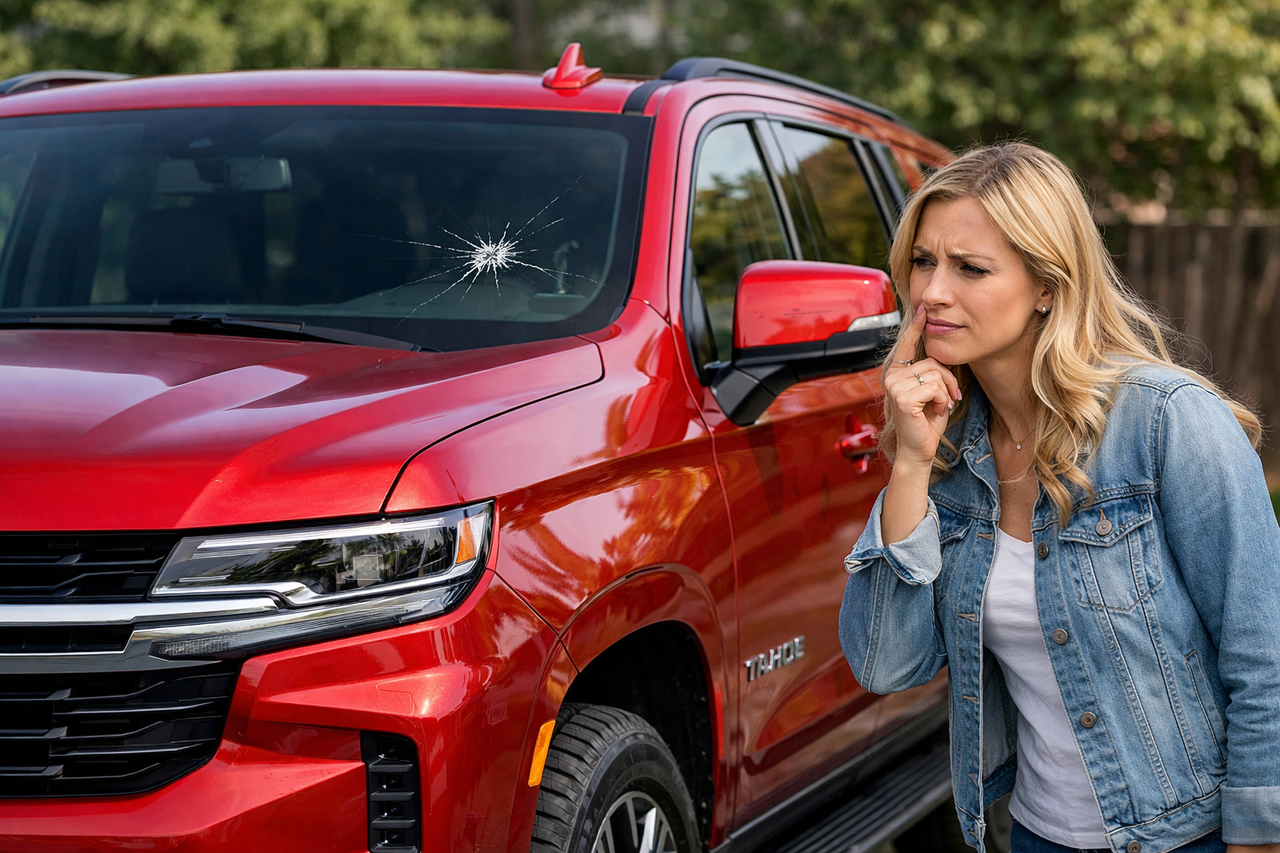
A lot of owners hope for a sealant miracle. I understand. Replacing a windshield or a large quarter pane means time and money. But urethane bonds age, especially after an impact. I remember a small SUV that came in after a flying pebble left a chip near the glass edge. The chip looked harmless, and a quick fill might have held. The owner waited. Weeks later, a heavy rain revealed a damp headliner. We found a long stretch of urethane that had pulled from the body because the initial install left thin spots at the corners. The impact and thermal changes finished the job. Windshield repair High Point shops do impressive work with chips, but once the bond line is compromised, windshield replacement High Point drivers receive from a reputable installer is the safer, smarter path.
The same logic applies to rear quarter glass with encapsulated frames. If the frame’s edge has cracked and lifted, especially near a clip, your choices narrow. Adding glue on the outside traps water and dirt, and the problem returns. Replacing the glass with a fresh frame seats the clips tight, restores the weather line, and stops the cycle.
The shop conversation that helps you get it right
When you talk with a high point auto glass professional, a few focused questions set the tone and protect your car.
- How will you diagnose the leak before recommending a fix? What adhesive system do you use, and what is the safe-drive-away time today? If rust is present at the pinch weld, how will you treat it before applying urethane? Are you recalibrating ADAS cameras if the windshield comes out, and is that done in-house or with a partner? What warranty do you provide on leak repairs and replacements?
You do not need jargon. Clear answers show a shop’s habits. Auto glass replacement High Point services that invest in calibration targets, primers matched to temperature and humidity, and rust control produce fewer comebacks. For busy schedules, emergency auto glass High Point providers sometimes offer after-hours or weekend response. That is useful when a leak threatens electronics or when a broken window leaves the car unsecured, but do not rush the cure. Even emergency work needs the right adhesive and time to set.
A careful DIY path for simple seal issues
If you want to work through a straightforward door seal problem yourself, keep it deliberate and clean.
- Wash the glass and the seal area with a mild automotive soap, then rinse. Lift the outer belt molding gently with a plastic trim tool and flush grit with low-pressure water. Dry the channel and belt molding with a lint-free towel. Run a felt block between the glass and inner belt molding to remove fine debris. Avoid petroleum-based dressings. Inspect the door drains along the bottom seam. Clear any dirt with a small brush or compressed air, held at a distance. Check the door striker alignment. If the door sits proud at the top rear corner, loosen the striker bolts slightly and nudge inward in tiny steps, testing seal compression with the dollar bill test. If the perimeter seal is torn or flat, order a replacement matched to your VIN. Install begins at the midpoint on the hinge side, pressing the seal evenly onto the pinch flange. Do not stretch the rubber. Seat corners carefully.
This sequence won’t fix a failed urethane bond or a poor windshield install. It will address many door-related leaks and noises without introducing new problems.
Seasonal habits that keep seals healthy
Seals need the same maintenance mindset as wiper blades and tires. A couple of minutes after each wash makes a difference. Wipe door seals with a damp microfiber to remove grit. Apply a light coat of a water-based rubber protectant every few months, especially ahead of summer heat and winter frost. Keep drains open. In fall, brush leaves from the cowl area at the base of the windshield, because a clogged cowl sends water into the cabin through fresh air intakes and seams that were never meant to hold standing water. If you park outside near High Point’s many pines, a simple windshield cover during pollen weeks saves hours of cleanup later.
Cost and time expectations
Prices vary by vehicle and part availability, but some ranges help set expectations around car window repair High Point shops commonly quote. Cleaning and conditioning seals is often bundled into a diagnostic hour. Adjustments and run channel replacements can run from low hundreds, depending on parts. Replacing a perimeter door seal sits in the same ballpark, higher for premium models with complex profiles. Resealing a windshield leak on a recently replaced glass might be a quick warranty fix. Full windshield replacement ranges more widely, from a few hundred dollars for common models to over a thousand for vehicles with heating elements, HUD, and camera brackets that require calibration.
Time matters too. Simple door work may finish in an hour or two. Urethane-based jobs depend on cure times. On a warm, humid afternoon, a high-modulus adhesive might reach safe-drive-away within an hour, while a cool, dry morning can push that to two or more. Ask the shop for that day’s window before planning a highway trip.
Choosing shop or mobile, same day or scheduled
Mobile service has improved a great deal. Many vehicles can be handled in your driveway or at work by mobile auto glass High Point teams, as long as the weather cooperates and the job does not require rust remediation or complex trim work. If a tech needs controlled dust, exact temperatures, or calibration rigs, a shop bay is more reliable. Same day auto glass High Point offerings work well when you catch a leak early and the fix is clear, like a damaged belt molding or a straightforward windshield swap. When a water trail points to multiple sources, or when someone else’s old silicone smear needs removing, give the job a proper slot indoors.
When the problem isn’t the window at all
A final note learned the hard way: not every wet floor comes from a window. Sunroof drains clog and overflow into A-pillars. Cabin air filter housings at the cowl can crack or lose a gasket. Body seam sealer can split near a quarter panel after a minor scrape. I have seen owners replace two windshields chasing a leak that started at a missing cowl clip. A methodical water test that isolates zones prevents that. Good shops that do auto glass repair High Point residents recommend will check sunroof drains, cowl integrity, and vapor barriers before calling for glass work.
The payoff of doing seals right
The test is quiet confidence. Doors shut with a solid feel, the cabin stays dry after a night of rain, and there is no mystery fog line on a cold start. If you decide to sell the car, the absence of musty odor and the look of clean, supple seals tell a buyer the vehicle has been cared for. If you keep it, electronics last longer and you avoid the slow, expensive decay that moisture works on carpet, padding, and hidden connectors.
Whether you handle the basic steps yourself or call a specialist, aim for simple principles. Keep the channels and drains clean. Treat rubber Windshield replacement High Point like the vital component it is, not trim to be shined. Use the right adhesives in the right conditions. Respect cure times. Pick a shop that measures twice and cuts once. With that approach, the glass, the seals around it, and everything inside the cabin will do their jobs through High Point’s heat, thunderstorms, and cold snaps without complaint.
And if your week has already run off the rails and you need someone to come to you, there are reliable options for car window replacement High Point wide, plus emergency auto glass High Point services that understand the clock and the weather. Ask the right questions, give them the symptoms you have seen, and let them bring the right tools and materials for your car on that day. Repairing window seals is not glamorous, but when it’s done with care, you stop thinking about them at all, which is the whole point.